Introduction
What are Binaural Beats?
A binaural beat is an auditory illusion perceived when two different pure-tone sine waves are heard dichotically, that is one through each ear. For example, if you wear a pair of headphones and one side is playing a 440Hz tone and the other side is playing a 450Hz tone you will actually hear a third tone that is the difference of the two frequencies. Your brain will interpret the difference between 440Hz and 450Hz and you will hear a third tone of 10Hz. Read more about binaural beats on the Wikipedia entry on binaural beats.
Brainwave Entrainment
It is possible for external stimuli to persuade your brain to operate on certain frequencies. It is similar to sypmathetic resonance if you play any musical instruments. When you listen to binaural audio and your brain interprets and hears the third tone it also starts to entrain to that frequency. The theory is that you can listen to the binaural beats during a meditation to help bring your brain down to a lower frequency meditative state. Read more about brainwave entrainment on Wikipedia's entries for brainwave entrainment and binaural beats in brainwave entrainment.
EEG Headset
If you are interested in monitoring your brainwaves with an electroencephalograph (EEG), NeuroSky has an EEG headset available for only $99. I have an older model but it is good for monitoring your brainwaves in real time or keeping a log and comparing them over time. Wear it during the day when you work to see what your brain is up to, or wear it during meditation sessions and see how your waves change over time. You can do your own experiments with this headset to see if the binaural audio actually has any effect on your brainwaves. You can buy a new one on Amazon.
The Source Code
First, let's look at the entire program as a whole. The whole program is less than 100 lines but some of the audio terminology and details can be confusing. Don't try to understand all of it now. Just skim through the program as a whole and if you want try to run it on your machine. Further down the page I will break it down piece by piece and explain how it all works.
You should wear headphones when listening to the audio to get the full effect. You will be able to hear the effect without headphones but it will not be the same.
To compile and run this program, you will need a Java JDK and the source code for Binaural.java.
# Save the code in a file named Binaural.java
wget https://www.devdungeon.com/sites/default/static/binaural_java/Binaural.java
# Compile it with
javac Binaural.java
# Run it with
java Binaural
import java.util.logging.Level;
import java.util.logging.Logger;
import javax.sound.sampled.AudioFormat;
import javax.sound.sampled.AudioSystem;
import javax.sound.sampled.LineUnavailableException;
import javax.sound.sampled.SourceDataLine;
public class Binaural {
private static final int SAMPLE_RATE = 16 * 1024; // 16KHz
private static final int SAMPLE_SIZE = 8; // 8 bits per sample
private static final int NUM_CHANNELS = 2; // Stereo
private final byte leftChannel[] = new byte[SAMPLE_RATE]; // 1 sec of samples
private final byte rightChannel[] = new byte[SAMPLE_RATE];
private SourceDataLine line = null;
private final AudioFormat audioFormat = new AudioFormat(
SAMPLE_RATE,
SAMPLE_SIZE,
NUM_CHANNELS,
true,
true
);
public static void main(String[] args) {
int leftFreq = 440; // A = 440Hz
int rightFreq = 448;
Binaural binauralGenerator = new Binaural(leftFreq, rightFreq);
binauralGenerator.play(3); // Play for 3 seconds
binauralGenerator.shutdown();
}
private Binaural(int leftFreq, int rightFreq) {
// Fill the left and right channel buffers with sine waves
fillBufferWithSineWave(leftChannel, leftFreq);
fillBufferWithSineWave(rightChannel, rightFreq);
// Initialize audio output
try {
line = AudioSystem.getSourceDataLine(audioFormat);
line.open(audioFormat, (int) audioFormat.getSampleRate());
line.start();
} catch (LineUnavailableException ex) {
Logger.getLogger(Binaural.class.getName()).log(Level.SEVERE, null, ex);
System.exit(1);
}
}
private void fillBufferWithSineWave(byte[] buffer, int frequency) {
double period = (double) SAMPLE_RATE / frequency;
for (int i = 0; i < SAMPLE_RATE; i++) { // Fill each byte of the buffer
double angle = 2.0 * Math.PI * i / period;
buffer[i] = (byte) (Math.sin(angle) * 127f);
}
}
private void play(int seconds) {
int samplePosition = 0;
int endPosition = (int)audioFormat.getSampleRate();
for (int i = 0; i < SAMPLE_RATE * seconds / 2; i++) {
line.write(leftChannel, samplePosition, 2); // 2 bytes from each
line.write(rightChannel, samplePosition, 2);
samplePosition += 2;
if (samplePosition >= endPosition) {
samplePosition = 0;
}
}
}
private void shutdown() {
line.flush();
line.close();
}
}Breakdown
Let's take a look at one piece at a time to understand how it all works.
The Variables
If you are not familiar with the terms sample rate and sample size or want to review the basics of digital audio, I recommend reading this reference on digital audio from the Audacity wiki.
We are defining some constants first with the SAMPLE_RATE, SAMPLE_SIZE, and NUM_CHANNELS. These are used to determine what size buffers we will need, and will be important for calculating the sine waves. We also create two buffers (an array of bytes), one for each channel. The SourceDataLine is the actual hardware device that will be playing our audio. We need the AudioFormat object in order to properly open the hardware device with the right settings.
private static final int SAMPLE_RATE = 16 * 1024; // ~16KHz
private static final int SAMPLE_SIZE = 8; // 8 bits per sample
private static final int NUM_CHANNELS = 2; // Stereo
private final byte leftChannel[] = new byte[SAMPLE_RATE]; // 1 sec of samples
private final byte rightChannel[] = new byte[SAMPLE_RATE];
private SourceDataLine line = null;
private final AudioFormat audioFormat = new AudioFormat(
        SAMPLE_RATE,
        SAMPLE_SIZE,
        NUM_CHANNELS,
        true,
        true
);
The Main Function
The main function should be easy enough to read. We define the frequencies we want for the left and right channels. We then create a Binaural object and pass it the frequencies we want. We call the play() function and tell it how many seconds we want it to play. Then shutdown() is called to clean up and release the hardware device.
public static void main(String[] args) {
    int leftFreq = 440; // A = 440Hz
    int rightFreq = 448;
    Binaural binauralGenerator = new Binaural(leftFreq, rightFreq);
    binauralGenerator.play(3); // Play for 3 seconds
    binauralGenerator.shutdown();
}
The Constructor
The constructor fills the audio buffers with sine waves and initializes the audio output device.
private Binaural(int leftFreq, int rightFreq) {
    // Fill the left and right channel buffers with sine waves
    fillBufferWithSineWave(leftChannel, leftFreq);
    fillBufferWithSineWave(rightChannel, rightFreq);

    // Initialize audio output
    try {
        line = AudioSystem.getSourceDataLine(audioFormat);
        line.open(audioFormat, (int) audioFormat.getSampleRate());
        line.start();
    } catch (LineUnavailableException ex) {
        Logger.getLogger(Binaural.class.getName()).log(Level.SEVERE, null, ex);
        System.exit(1);
    }
}
Generating the Sine Waves
Generating the sine waves involves a little bit of math. You can trust that this function will generate a sine wave but if you want to learn more about the math read the Wikepedia entry on sine waves. In addition to generating the sine wave in this function it also fills up the byte array buffer with the generated values. Those buffers will be written to the sound card later.
private void fillBufferWithSineWave(byte[] buffer, int frequency) {
    double period = (double) SAMPLE_RATE / frequency;
    for (int i = 0; i < SAMPLE_RATE; i++) { // Fill each byte of the buffer
        double angle = 2.0 * Math.PI * i / period;
        buffer[i] = (byte) (Math.sin(angle) * 127f);
    }
}
Playing the Audio
The SourceDataLine makes it easy to simply write bytes to the sound card. The tricky part is that we have to interpolate the left and right channel. We can't just write the entire left buffer and then the entire right buffer or else it will just play one tone and then another, instead of playing both tone simultaneously. We have to write one piece of the left buffer followed by a piece of the right buffer on each iteration. We write two bytes at a time because the framesize is two bytes. The sample position is used to keep track of where we are when iterating through the buffer array. When we get to the end we set the position back to 0 to repeat the sample.
private void play(int seconds) {
    // Keep track of position so we know when to repeat
    int samplePosition = 0;
    int endPosition = (int)audioFormat.getSampleRate();

    // Play for specified number of seconds
    for (int i = 0; i < SAMPLE_RATE * seconds / 2; i++) {
        line.write(leftChannel, samplePosition, 2); // 2 bytes from each
        line.write(rightChannel, samplePosition, 2);
        samplePosition += 2;
        if (samplePosition >= endPosition) {
            samplePosition = 0;
        }
    }
}
Cleaning Up
The last thing we do is flush() the line which tells the device to drop and ignore any buffers it may have that are still queued up and haven't been played yet. Then we close() the line.
private void shutdown() {
    line.flush();
    line.close();
}
What Next?
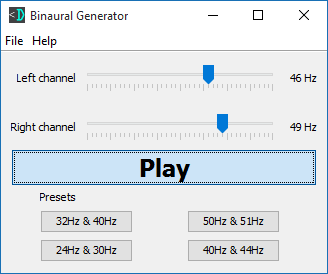
The example above should be a good starting place to explore audio in Java. You can extend the program to take in the frequencies from the user at the command line, or have it gradually change frequency over time. I also suggest you check out the Binaural Generator tool I created. It has a Swing GUI with two sliders to control the frequencies of each channel and a play button to toggle the sound on and off.