Overview
- Intro
- Important Things to Learn
- Python 2 vs 3
- Widgets
- Pop-up Dialog Windows
- Examples
- Check TkVersion
- Minimal Program
- Set Icon and Title of Window
- Get Screen Size
- Make Window Full Screen
- Set Size and Location of Window
- Displaying Text
- Unpack a widget
- Change Fonts
- Packing Options
- Displaying an Image
- Buttons with Callbacks
- Modify Existing Widget
- Menu Bar
- Menu Bar with Dropdown
- Input and Output with Entry Widget
- Bind Mouse Click to Label
- Use Threads to Perform Background Operations
- Pop-up Dialog
- Multiple Top Level Windows
- Focus Different Toplevel Windows
- Drawing with the Canvas
- Shrink an Image
- Get and Set Pixels of an Image
- Further Reading
Intro
There are many options for GUI programming with Python but the easiest one to use is Tk because it comes packaged with Python and is cross platform. It used to be ugly and had a limited set of widgets, but with version 8.5+ it integrates better with the native system and has more widgets to choose from.
This is aimed at developers who are already familiar with Python but not familiar with GUI programming. I have two goals here. One is to provide examples and demonstrate that GUI programming is not as painful as most developers would expect. The other is to provide a high level view of the widgets that are available for you to use.
All examples are in Python 3. The Windows and Mac OS X distributions come with Tkinter by default, but some Linux distributions may require separate installation. Refer to your distribution documentation for install Tkinter if necessary. Each example is a standalone program that can be run. You can actually copy/paste them right in to the interactive Python3 interpreter to try them out (except for the couple that require a command line argument to pass an image path).
Important Things to Learn
- There is one main parent window. Widgets and other windows are children of the main window.
- What widgets are available (e.g. Label, Button, Progressbar)
- What options are available on widgets (e.g. border, font, cursor, background, text, command)
- How to pack widgets in to a window
Python 2 vs 3
In Python 3, tkinter is still available, but the import names changed. In Python 2 the main package is Tkinter and there are additional packages like the toolkit ttk and constants Tkconstants. In Python 3 the naming and organization was improved. Everything is now under the tkinter package. There is tkinter, tkinter.constants, and tk.ttk. The rest of the examples here will use Python 3.
# Python 2 imports
import Tkinter
import Tkconstants
import ttk

# Python 3 import example
import tkinter
from tkinter import constants
from tkinter import ttk
Widgets
Widgets are the building blocks of a GUI program. They are used to display information or get input from the user.
| Frame | Used as a container to house other widgets and add borders |
| Label | Display text or images |
| Labelframe | A frame that by default displays a border and title |
| Button | Standard button that calls a function when clicked |
| Checkbutton | Check box for toggling a value (can have callback on click) |
| Radiobutton | Standard radio buttons |
| Entry | Single line editable text entry |
| Text | Multiple line editable text entry |
| Message | Multiple line display text that can be styled |
| Combobox | A single line text entry field that also has a drop down select list. Choose pre-defined items or enter a custom value. |
| Listbox | Multiple line select list |
| Scrollbar | Vertical or horizontal |
| Sizegrip | For adding a triangle in the bottom right corner of a window to make it easier to grab and resize |
| Progressbar | Progress bars that can be customized in many ways |
| Scale | Sliding scale to be clicked and dragged with mouse |
| Spinbox | Like a single line text entry widget with up and down arrows on the side to increment or decrement. Mousewheel up and down to raise and lower values |
| Separator | Visually separate widgets vertically or horizontally |
| Notebook | Tabbed contents |
| Panedwindow | Like a frame that contains a horizontal or vertical set of frames that are resizeable in relation to each other |
| Canvas | For drawing graphics like lines, circles, arcs, ovals, and rectangles |
| Toplevel | A window just like the main window with its own title bar and can be moved and resized on its own. If the main window is destroyed, all other top levels are destroyed too |
| Menu | Menu bar for the top of the window. Typically things like "File", "Edit", and "View". |
| Optionmenu | Similar to Combobox or HTML select. A dropdown option select menu. |
Pop-up Dialog Windows
| askquestion | Ask a question with a yes or no response. |
| askyesno | Ask yes or no. |
| askyesnocancel | Ask yes, no, or cancel. |
| askokcancel | Ask ok or cancel. |
| askretrycancel | Ask retry or cancel |
| showinfo | Show pop-up with text and info icon. |
| showwarning | Show pop-up with text and warning icon. |
| showerror | Show pop-up with text and error icon. |
| Colorchooser | Visual color picker |
| Filedialog | Allow user to pick a file from the file system |
Check TkVersion
# check_tk_version.py
import tkinter
print(tkinter.TkVersion)
Minimal Program
# minimal_tkinter.py
from tkinter import Tk
root = Tk()
root.mainloop()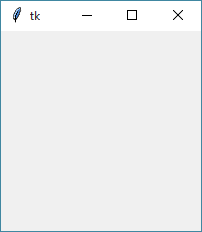
Set Icon and Title of Window
# set_icon_and_title.py
import sys
from tkinter import Tk, PhotoImage
root = Tk()

# Image path provided as first command line arg. PNG format
root.iconphoto(root, PhotoImage(file=sys.argv[1]))
root.title("Tkinter Test")

root.mainloop()
Get Screen Size
# get_screen_size.py
from tkinter import Tk
root = Tk()

screen_width = root.winfo_screenwidth()
screen_height = root.winfo_screenheight()

print("Screen width:", screen_width)
print("Screen height:", screen_height)
Make Window Full Screen
# make_fullscreen_window.py
from tkinter import Tk
root = Tk()

root.attributes('-fullscreen', True)

root.mainloop()
Set Size and Location of Window
# set_window_geometry.py
from tkinter import Tk
root = Tk()

# Make window 300x150 and place at position (50,50)
root.geometry("300x150+50+50")

root.mainloop()
Displaying Text
# display_text.py
from tkinter import Tk, Label
root = Tk()

# Create a label as a child of root window
my_text = Label(root, text='Hello, world!')
my_text.pack()

root.mainloop()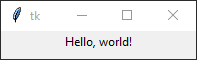
Unpack a widget
If you want to remove a widget from the heirarchy, you can tell it to unpack itself. This can be useful if you want to display a loading message temporarily and then remove it and place in the final content.
# unpack.py
import time
from tkinter import Tk, Label
root = Tk()

my_text = Label(root, text='Hello, world!')
my_text.pack()
my_text.pack_forget()

root.mainloop()
Change Fonts
# change_font.py
from tkinter import Tk, Message
root = Tk()

msg = Message(root, text='Hello, world!')

# Font is a tuple of (font_family, size_in_points, style_modifier_string)
msg.config(font=('times', 48, 'italic bold underline'))

msg.pack()

root.mainloop()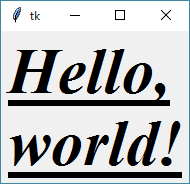
Packing Options
# pack_options.py
from tkinter import Tk, Label, Y, RIGHT
root = Tk()

label1 = Label(root, text='Yellow!', background='yellow')
label2 = Label(root, text='Orange?', background='orange')

# Some of the packing options:
# - fill: tells the widget to expand to take up any extra space (X, Y, or BOTH)
# - padx/pady: outter padding
# - ipadx/ipady: inner padding
# - side: which side to stack from. Default is TOP (to bottom)

label1.pack(fill=Y, padx=25, ipady=15, side=RIGHT)  # Pack from right to left
label2.pack(fill=Y, padx=25, ipady=15, side=RIGHT)

root.mainloop()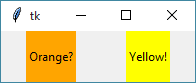
Displaying an Image
# display_image.py
import sys
from tkinter import Tk, Label, PhotoImage
root = Tk()

# First command line arg is image path. PNG format
img = PhotoImage(file=sys.argv[1])
my_image = Label(root, image=img)
my_image.pack()

root.mainloop()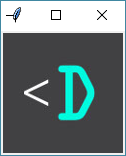
Buttons with Callbacks
# button_callback.py
from tkinter import Tk, Button
root = Tk()

# Create a button that will destroy the main window when clicked
exit_button = Button(root, text='Exit Program', command=root.destroy)
exit_button.pack()

# Create a button with a custom callback
def my_callback():
    print("The button was clicked!")  # Prints to console not the GUI

print_button = Button(root, text='Click me!', command=my_callback)
print_button.pack()

root.mainloop()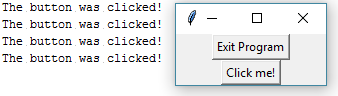
Modify Existing Widget
# modify_widget.py
from tkinter import Tk, Label
root = Tk()

# Create a plain label that says "Hello, world!"
label = Label(root, text='Hello, world!')
label.pack()

# Modify a widget with config(). Widgets can be modified after packing.
label.config(foreground='yellow', background='black', text='Updated text!')

root.mainloop()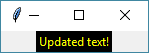
Menu Bar
# menu_bar.py
from tkinter import Tk, Menu
root = Tk()

# Create a main menu and add a command to it
main_menu = Menu(root, tearoff=0)
main_menu.add_command(label="Quit", command=root.destroy)

root.config(menu=main_menu)
root.mainloop()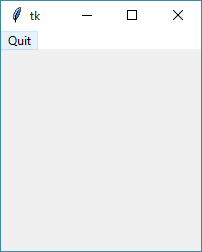
Menu Bar with Dropdown
# menu_bar_dropdown.py
from tkinter import Tk, Menu
root = Tk()

# Create main menu bar
menu_bar = Menu(root)

# Create the submenu (tearoff is if menu can pop out)
file_menu = Menu(menu_bar, tearoff=0)

# Add commands to submenu
file_menu.add_command(label="Quit!", command=root.destroy)
file_menu.add_command(label="Exit!", command=root.destroy)
file_menu.add_command(label="End!", command=root.destroy)

# Add the "File" drop down sub-menu in the main menu bar
menu_bar.add_cascade(label="File", menu=file_menu)

root.config(menu=menu_bar)
root.mainloop()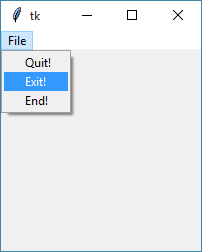
Input and Output with Entry Widget
# entry_widget.py
from tkinter import Tk, Entry, Button, INSERT
root = Tk()

# Create single line text entry box
entry = Entry(root)
entry.pack()

# Specifying character position in entry
# - END: After last character of entry widget
# - ANCHOR: The beginning of the current selection
# - INSERT: Current text cursor position
# - "@x": Mouse coordinates

# Insert some default text
entry.insert(INSERT, 'Hello, world!')

# Print the contents of entry widget to console
def print_content():
    print(entry.get())

# Create a button that will print the contents of the entry
button = Button(root, text='Print content', command=print_content)
button.pack()

root.mainloop()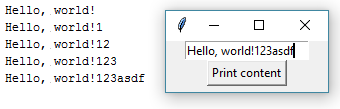
Bind Mouse Click to Label
# label_click_event.py
from tkinter import Tk, Label
root = Tk()

# Labels do not have a command option like buttons
# but you can manually attach the click event to a callback
label = Label(root, text='I am a label. Click me.')
label.pack()

def my_callback():
    print('Label was clicked.')

# Bind mouse button 1 click on label
label.bind("<Button-1>", lambda e:my_callback())

# A lambda with parameters looks like this:
# lambda event, a=12, b=34:my_callback(a, b))

root.mainloop()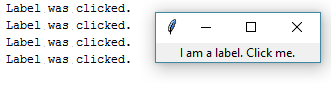
Use Threads to Perform Background Operations
# threading_example.py
import threading
import time
from tkinter import Tk, Button

root = Tk()

def just_wait(seconds):
    print('Waiting for ', seconds, ' seconds...')
    time.sleep(seconds)
    print('Done sleeping.')

def button_callback():
    # Without the thread, the button will stay depressed and the
    # program will respond until the function has returned
    my_thread = threading.Thread(target=just_wait, args=(5,))
    my_thread.start()

button = Button(root, text='Run long thread.', command=button_callback)
button.pack()

# Without them pressing a button that performs
# a long action will pause the entire program and it
# Will appear as if the program froze - Note about the GIL and only maximizing one cpu

root.mainloop()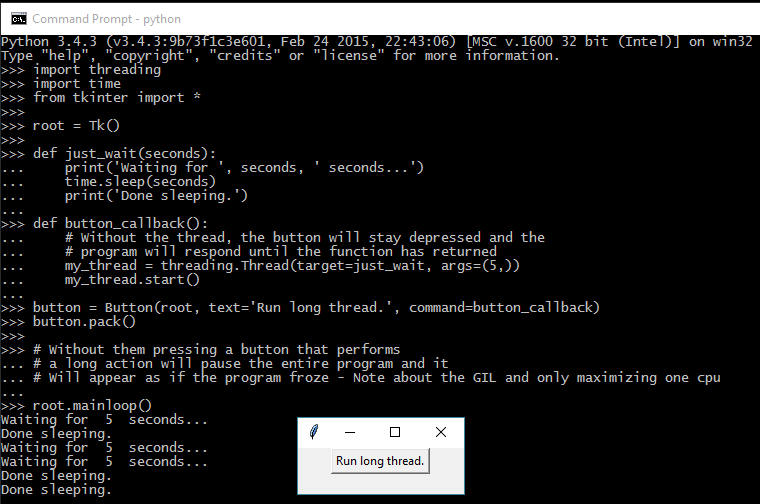
Pop-up Dialog
# ask_yes_no.py
from tkinter import messagebox

dialog_title = 'Please answer'
dialog_text = 'Do you like bacon?'
answer = messagebox.askquestion(dialog_title, dialog_text)

if answer == 'yes':
    print('I like bacon too!')
else:  # 'no'
    print('You must have clicked the wrong button by accident.')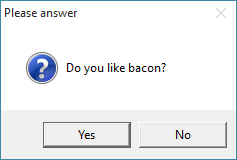
Multiple Top Level Windows
# create_destroy_toplevel.py
from tkinter import Tk, Toplevel, Button
root = Tk()

# Create new top level window. Opens immediately
second_window = Toplevel()
second_window.title('Second window')

# Destroy window
def destroy_second_window():
    second_window.destroy()

close_button = Button(
    root,
    text='Close second window',
    command=destroy_second_window
)
close_button.pack()

root.mainloop()
Focus Different Toplevel Windows
# focus_toplevel.py
from tkinter import Tk, Toplevel
root = Tk()

second_window = Toplevel()
second_window.title('Second window')

# Focus on window
second_window.focus_force()

root.mainloop()
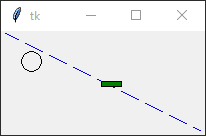
Drawing with the Canvas
# canvas_draw.py
from tkinter import Tk, Canvas
root = Tk()

canv = Canvas(root, width=200, height=100)
canv.pack()

# Draw blue line from top left to bottom right with wide dashes
canv.create_line(0, 0, 200, 100, fill='blue', dash=(5, 15))

# Draw green rectangle at (100,50) to (120,55)
canv.create_rectangle(100, 50, 120, 55, fill='green')

# Draw oval(circle) from (20,20) to (40,40)
canv.create_oval(20, 20, 40, 40)

root.mainloop()
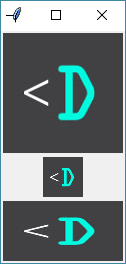
Shrink an Image
# shrink_image.py
import sys
from tkinter import Tk, PhotoImage, Label
root = Tk()

# First command line arg is image path. PNG format
base_img = PhotoImage(file=sys.argv[1])

# Take only every 3rd pixel from x and y resulting in an image of 1/3 size
img1 = base_img.subsample(3, 3)

# Take every pixel from x but only every other from y. Shrinks y by half
img2 = base_img.subsample(1, 2)

base_img_label = Label(root, image=base_img)
img1_label = Label(root, image=img1)
img2_label = Label(root, image=img2)

base_img_label.pack()
img1_label.pack()
img2_label.pack()

root.mainloop()
Get and Set Pixels of an Image
# get_set_image_pixels.py
import sys
from tkinter import Tk, PhotoImage, Label
root = Tk()

# First command line arg is image path. PNG format
img = PhotoImage(file=sys.argv[1])

red = 255
green = 0
blue = 0
x = 0
y = 0

# Sets the top left pixel of the image to red (difficult to see)
img.put("#%02x%02x%02x" % (red, green, blue), (y, x))

# Get the (red, green, blue) tuple of pixel at 0,0
top_left_pixel = img.get(0, 0)
print(top_left_pixel)

# Display the image
img_label = Label(root, image=img)
img_label.pack()

root.mainloop()
Further Reading
# focus_toplevel.py
from tkinter import Tk, Toplevel
root = Tk()
second_window = Toplevel()
second_window.title('Second window')
# Focus on window
second_window.focus_force()
root.mainloop()# canvas_draw.py
from tkinter import Tk, Canvas
root = Tk()
canv = Canvas(root, width=200, height=100)
canv.pack()
# Draw blue line from top left to bottom right with wide dashes
canv.create_line(0, 0, 200, 100, fill='blue', dash=(5, 15))
# Draw green rectangle at (100,50) to (120,55)
canv.create_rectangle(100, 50, 120, 55, fill='green')
# Draw oval(circle) from (20,20) to (40,40)
canv.create_oval(20, 20, 40, 40)
root.mainloop()# shrink_image.py
import sys
from tkinter import Tk, PhotoImage, Label
root = Tk()
# First command line arg is image path. PNG format
base_img = PhotoImage(file=sys.argv[1])
# Take only every 3rd pixel from x and y resulting in an image of 1/3 size
img1 = base_img.subsample(3, 3)
# Take every pixel from x but only every other from y. Shrinks y by half
img2 = base_img.subsample(1, 2)
base_img_label = Label(root, image=base_img)
img1_label = Label(root, image=img1)
img2_label = Label(root, image=img2)
base_img_label.pack()
img1_label.pack()
img2_label.pack()
root.mainloop()# get_set_image_pixels.py
import sys
from tkinter import Tk, PhotoImage, Label
root = Tk()
# First command line arg is image path. PNG format
img = PhotoImage(file=sys.argv[1])
red = 255
green = 0
blue = 0
x = 0
y = 0
# Sets the top left pixel of the image to red (difficult to see)
img.put("#%02x%02x%02x" % (red, green, blue), (y, x))
# Get the (red, green, blue) tuple of pixel at 0,0
top_left_pixel = img.get(0, 0)
print(top_left_pixel)
# Display the image
img_label = Label(root, image=img)
img_label.pack()
root.mainloop()